.png)
Webhooks allow SEOptimer to automatically send data from your embedded SEO audit form to another platform whenever a user submits the form.
This makes it possible to pass leads, website URLs, or other form information directly into your CRM, email platform, automation system, or custom application.
This guide explains the general concept of setting up a webhook for the SEOptimer embed form and shows you how to inspect the data being sent.
Because every receiving platform handles webhooks slightly differently, we’re going to focus on the general setup process rather than the configuration of a specific platform like Hubsport, Mailchimp etc.
A Quick Note About Technical Knowledge
Setting up the webhook itself inside SEOptimer is straightforward. However, handling the webhook data on the receiving side may require some technical knowledge.
For example, the system receiving the webhook must be able to:
- Accept incoming HTTP requests
- Read the data sent in the request
- Process or store the information
- Optionally pass the data to another system
This is usually done with a small server-side script or a workflow automation tool. If you plan to build your own webhook handler, some familiarity with web development and basic programming concepts may be helpful.
What is a Webhook?
A webhook is a way for one system to notify another system when something happens.In this case, the event is a form submission from the SEOptimer embed audit form.
When a visitor submits the form:
1. SEOptimer captures the form data
2. SEOptimer sends that data to a webhook handler URL
3. The receiving system processes the data
The process looks like this:
.png)
The webhook handler URL is simply an endpoint that is capable of receiving HTTP requests.
Setting Up Your Webhook
Step 1: Create a Webhook Handler URL
Before configuring the webhook in SEOptimer, you need a destination where the data will be sent. This destination is called the webhook handler URL.
Many platforms generate this URL automatically when you enable a webhook trigger. If you are building your own integration, the handler might be a script hosted on your server.
For demonstration purposes, you can use a tool like Webhook.site. Webhook.site allows you to generate a temporary webhook endpoint and view the requests that are sent to it. This makes it easy to inspect the data that SEOptimer sends.
.png)
You can open an example request inspector here:Webhook.site.
When you visit the site, it generates a unique webhook URL that looks something like this:
https://webhook.site/your-unique-id
This URL acts as the webhook handler.
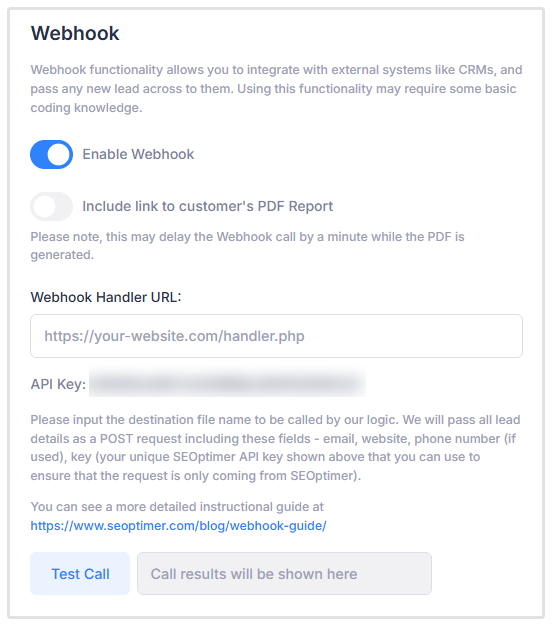
Step 2: Configure the Webhook in SEOptimer
Once you have your webhook handler URL, you can configure the webhook inside SEOptimer. First, you’ll need to navigate to the Embedding Settings page and scroll down to the Webhook section:
.png)
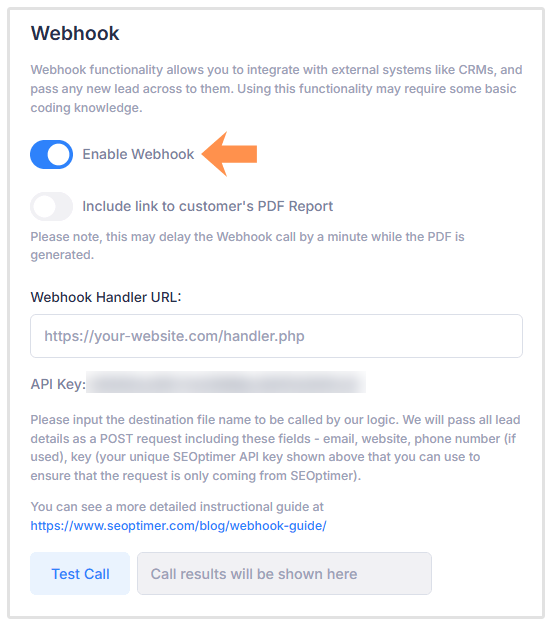
Then you need to enable the Webhook:
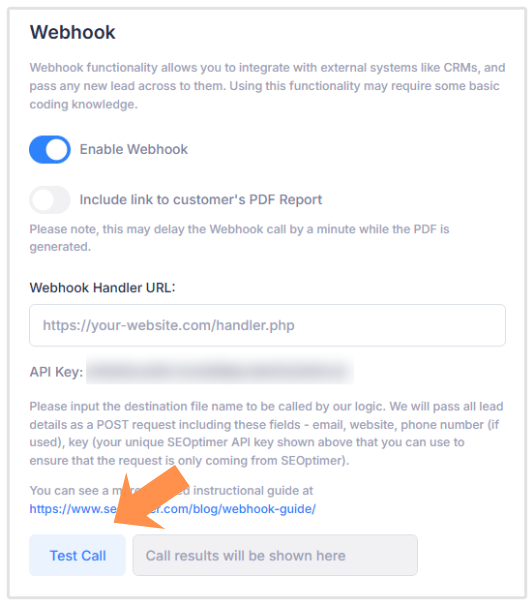
Next you need to paste your Webhook Handler URL into the correct field:
.png)
Once you’ve added the URL, click on Test Call to test your Webhook. You should see a 200 Ok message if your Webhook is configured correctly.
After saving the configuration, every time a user submits the audit form, SEOptimer will send the form data to the webhook URL.
Step 3: Inspect the Webhook Data
After submitting the test call, return to Webhook.site. You should see a new request appear in the request log.
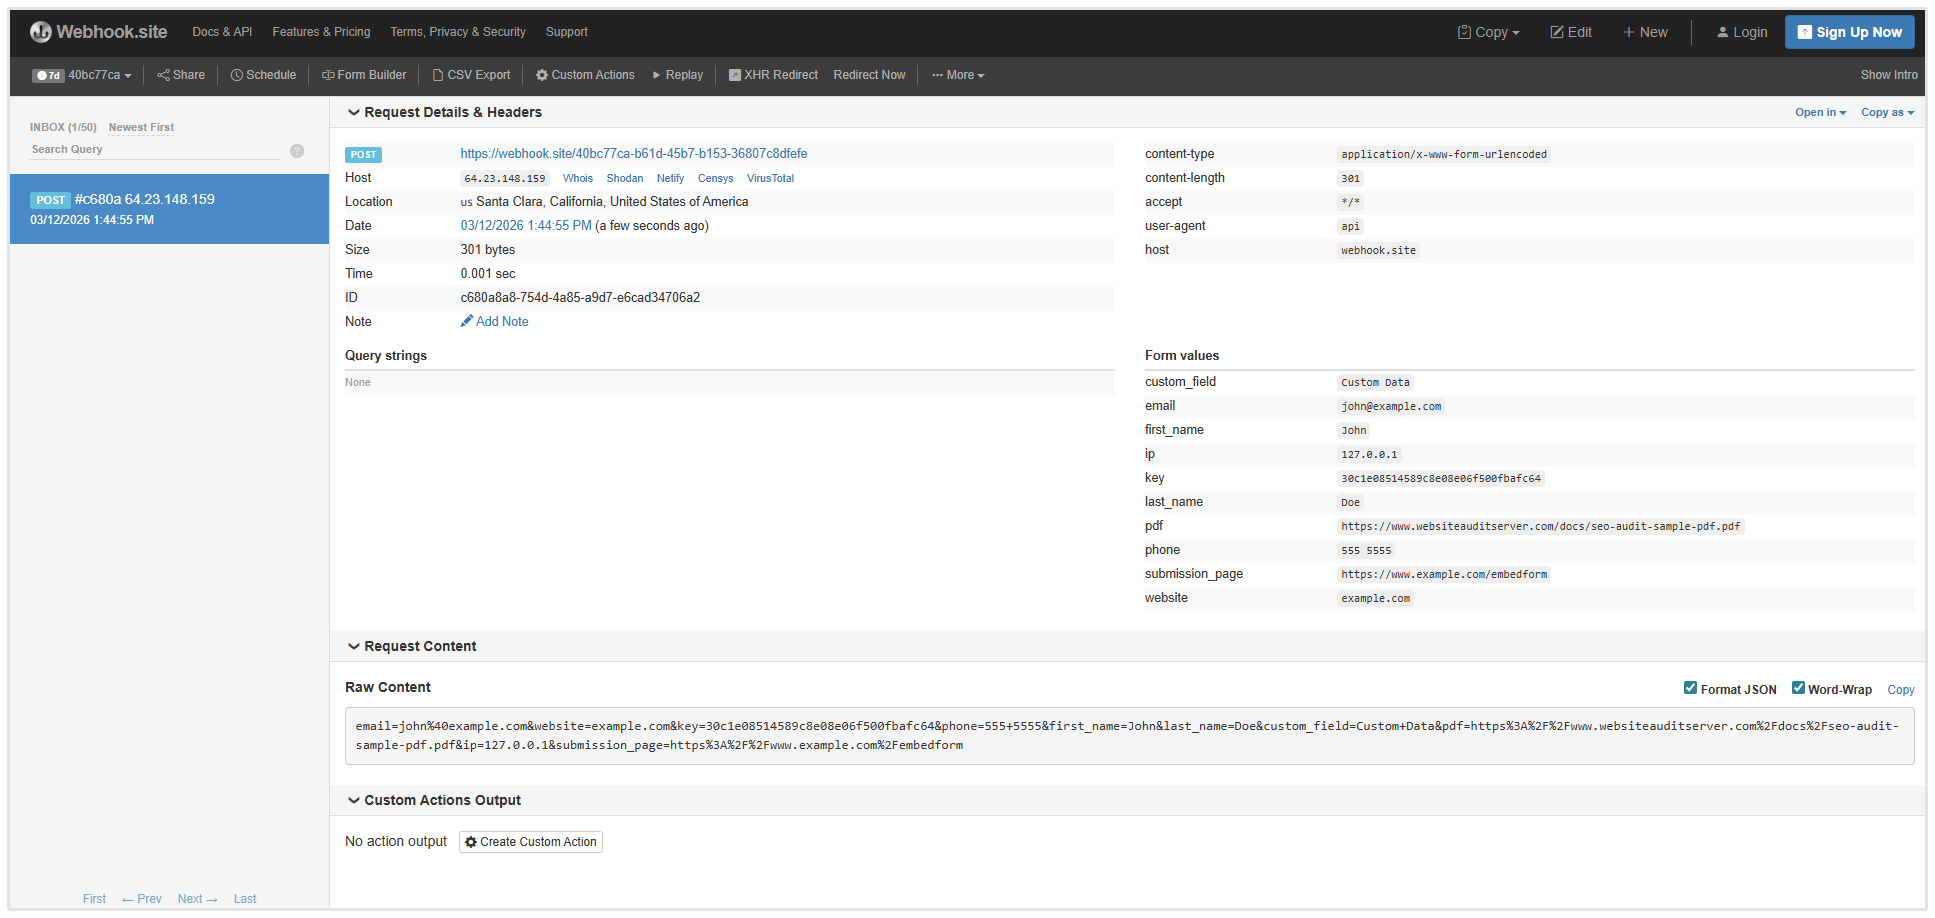
Selecting the request will show information such as:
- Request method
- Request headers
- Request body
- Payload data
The payload will typically contain values such as:
- name
- website
- audit_url
This data is what your webhook handler or external platform will receive and process. Understanding the structure of the payload is important because the receiving platform will need to map these values to its own fields.
Step 4: Example of a Simple Webhook Handler
If you are building your own integration, your webhook handler is simply a server endpoint that receives the data. A common approach when testing webhook payloads is to output the incoming data so you can see what was received.
Below are three simple PHP examples that can be used to handle and dump the data:
The Quick Way (print_r)
This method prints the contents of the request in a readable format. Wrapping the output in <pre> tags prevents the browser from rendering the output as a single long line.
echo "<pre>";
print_r($_POST);
echo "</pre>";
When a webhook request arrives, this will display the submitted fields and their values.
The Detailed Way (var_dump)
If you need more detail, including the data types and lengths of the values, you can use var_dump.
echo "<pre>";
var_dump($_POST);
echo "</pre>";
Or alternatively, you can use:
foreach ($_POST as $key => $value) {
echo "Field: " . htmlspecialchars($key) .
" | Value: " . htmlspecialchars($value) . "<br>";}
This approach provides additional debugging information and lists each field individually. These examples are commonly used when developing webhook handlers because they make it easy to inspect the structure of incoming requests.
Step 5: Using the Webhook Data
Once your webhook handler receives the data, it can perform any number of actions.For example, the handler could:
- Create a new contact in a CRM
- Add a subscriber to an email marketing list
- Send the lead information to a database
- Trigger a marketing automation workflow
- Pass the data to another API
- The exact implementation depends on the system you are connecting to.
Including an API Key
Most integrations require authentication when receiving webhook data. In these cases, the receiving platform may require an API key to be included with the request.
Your API key can be found on the Embedding Settings page below the Webhook handler URL field:
.png)
Depending on the platform, the key may be included in one of two ways.
API Key in the URL
The key may be added as a parameter in the webhook URL.
For example:
https://example.com/webhook?api_key=YOUR_API_KEY
API Key in the Request Headers
Alternatively, the key may be included in the request headers.
Example:
Authorization: Bearer YOUR_API_KEY
If the receiving platform requires authentication, make sure to follow its documentation for how the API key should be included.
Wrapping Up
Webhooks provide a powerful way to connect SEOptimer with other systems and automate what happens when a user submits your audit form. Once configured, webhooks allow you to automatically route new SEO audit leads into your existing marketing or sales workflow.
Need help?
Live Chat: Click Live Chat (bottom right)
Email: [email protected]
Response time: Within 24 hours

.png)