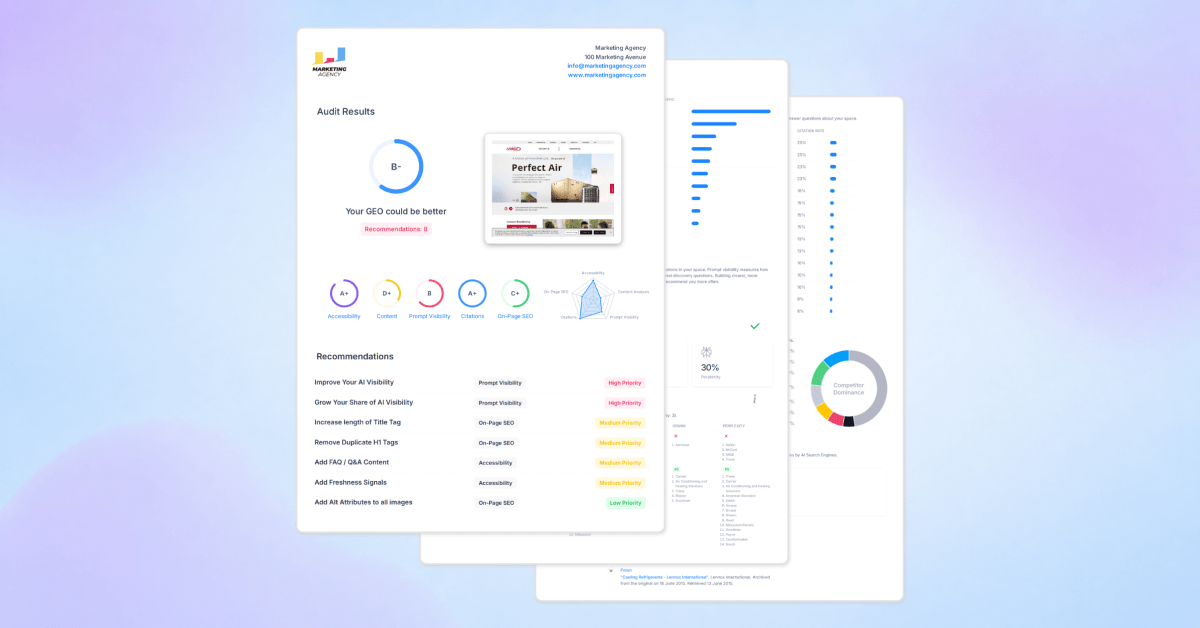
Embedding your SEOptimer audit form on a Webflow site is one of the easiest ways to capture high-quality leads directly from your website. Instead of sending visitors elsewhere, you can let them run an SEO audit and receive their report without ever leaving your page.
In this guide, we’ll walk you through exactly how to embed your SEOptimer form in Webflow step by step with no advanced coding knowledge required.
Before you start though, make sure you've set up the look and feel of your white label report template.
Check Your Webflow Plan
The embed functionality is what Webflow calls "Custom Code" which is only available on their paid site plans. If you're already on Webflow's Basic plan, Custom Code is included in this plan so you won't need to change your plan.
However if you have a free Webflow site with a blog, you'll need to move up to Webflow's CMS plan which enables the Custom Code feature (or if you have a Webflow site without a blog, the Basic plan will be sufficient!).
These plan details were accurate at the time of writing, so please check Webflow's pricing page for their latest plans, pricing and features.
.png)
Once your Webflow plan is ready. It's time to generate your embed code in SEOptimer.
First, log in to SEOptimer and click the Embedding Settings tab in the left menu.
.png)
Next, complete the settings for your embed form and once you're happy with the form, click 'Save Settings & Generate Embed Code'. This will reveal a code block at the top of the page:
.png)
You can read detailed instructions on how to set up your embed form here: How To Embed an Audit Form on Your Site.
Copy the Embed Code to Your Webflow Site
This part is where the Webflow installation is a bit different to other CMS platforms. Rather than copying the entire code block and pasting it as one big chunk on your site, you will need to copy each individual section of the code block and paste them in different places.
The SEOptimer code block is broken down into 3 sections:
-
-
- CSS (styling)
- HTML (the actual Embed Form)
- JavaScript (the form handler)
-
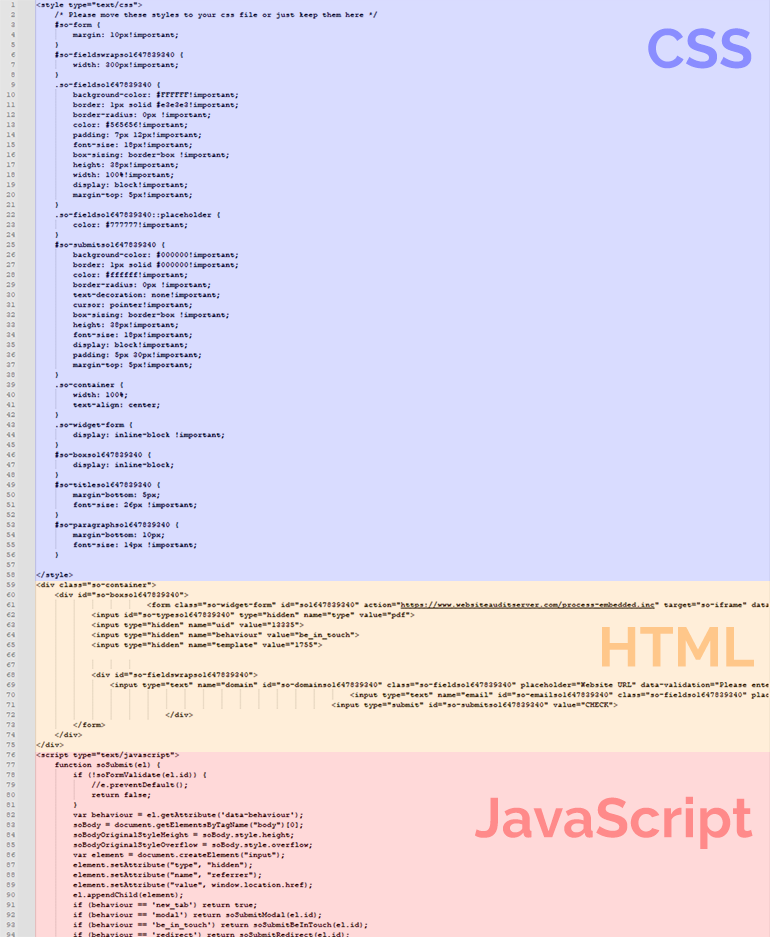
The easiest way to tell where each section starts and stops is to look for the following tags:
-
-
- CSS: starts with <style>, ends with </style>
- HTML: starts with <div>, ends with </div>
- JavaScript: starts with <script>, ends with </script>
-
Let's begin by selecting just the middle section - ie: the HTML section which starts with <div> and ends with </div>. Select this code with your mouse, then copy it (Ctrl + C / Command + C). Then switch back to Webflow.
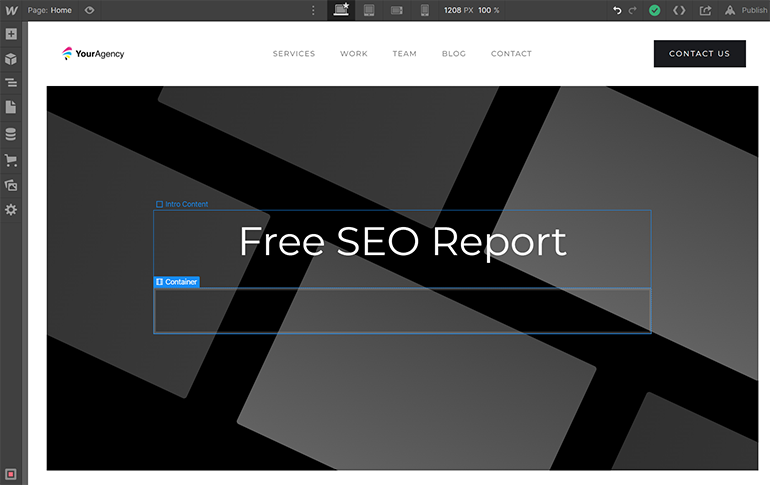
For the purposes of this guide, I have created a simple homepage with a big feature container and a middle and centre-aligned heading "Free SEO Report". I want to now embed the audit form directly under the heading:

Click the "Add Elements" button in the top left. Then click and drag the Container layout so it is directly underneath the heading:
Now that you have a new empty container, click the "Add Elements" button again in the top left. Scroll down to the "Components" section, then click and drag the "Embed" component (the 3rd option) and drop it into your new container:

This will automatically open the code box. Now you're ready to paste the code block (Ctrl + V / Command + V):
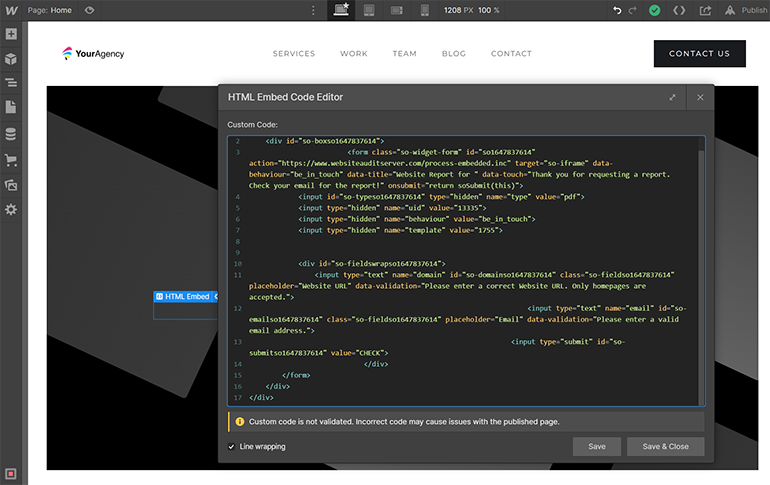
Click "Save & Close".
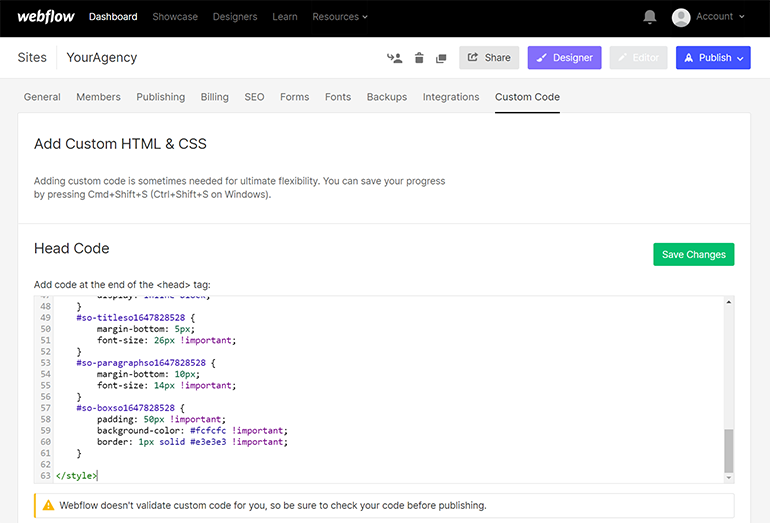
Switch back to SEOptimer and now we want to select the CSS section which starts on the first line with <style> and ends with </style>. Select this code with your mouse, then copy it (Ctrl + C / Command + C). Then switch back to Webflow.
Now click the top-left 'W' button and select 'Project Settings' and then click 'Custom Code' in the sub-menu. Paste the code into the 'Head Code' box (Ctrl + V / Command + V) and click the green 'Save Changes' button:
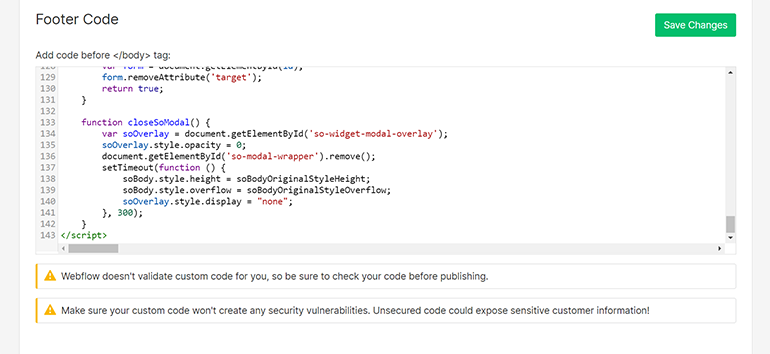
Switch back to SEOptimer and finally we want the last section which is the JavaScript section which starts with <script> and ends on the last line with </script>. Select this code with your mouse, then copy it (Ctrl + C / Command + C). Then switch back to Webflow.
Paste the code into the 'Footer Code' box (Ctrl + V / Command + V) and click the green 'Save Changes' button:
That's it! Click Publish in the top toolbar to push your changes live.
Test the Form to Make Sure it Works
Load your Webflow site and you should see your new Embed Form.
I'm doing a test using the URL "https://www.wallywine.com/" and I've put my SEOptimer email address in to simulate what the client experience is like. In my Embedding Settings in SEOptimer I ticked to send the client an email and added my "YourAgency" logo to the email.

After submitting the form, I then received an instant email with my report attached so I can see what the prospective client sees. Don't forget you can edit and customize all components of this email in the Embedding Settings:

Also, the new lead immediately landed in the "Leads" tab of SEOptimer:
.png)
Don't forget you can also setup automatic triggers via Zapier to push new Leads into your CRM, email tool, Slack or indeed any other app supported by Zapier. Here's another guide we wrote which covers how to push new leads into Mailchimp and another guide which covers how to push new leads into HubSpot.
Need Help?
Live Chat: Click Live Chat (bottom right)
Email: [email protected]
Response time: Within 24 hours