For customers on our White Label and Embedding plan, you can now send new lead data entered on your Embedded Audit form straight into Mailchimp (via Zapier). If you haven't heard of Zapier, it's a powerful integration tool that enables you to connect many of the apps you're already using.
Before you do this, ensure the Embeddable Audit Tool is installed on your website and capturing leads correctly. If you haven't done this yet, check out our step by step installation guide. Once that's done, let's get started with the Zapier connection:
1. Configure Your Mailchimp Account
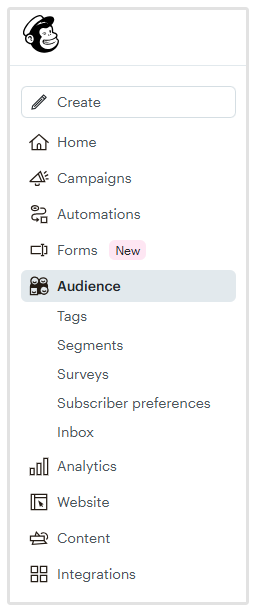
Before you jump into Zapier, you'll need to prepare your Mailchimp Audience first. Start by logging into Mailchimp, and click on Audience in the side bar on the left:
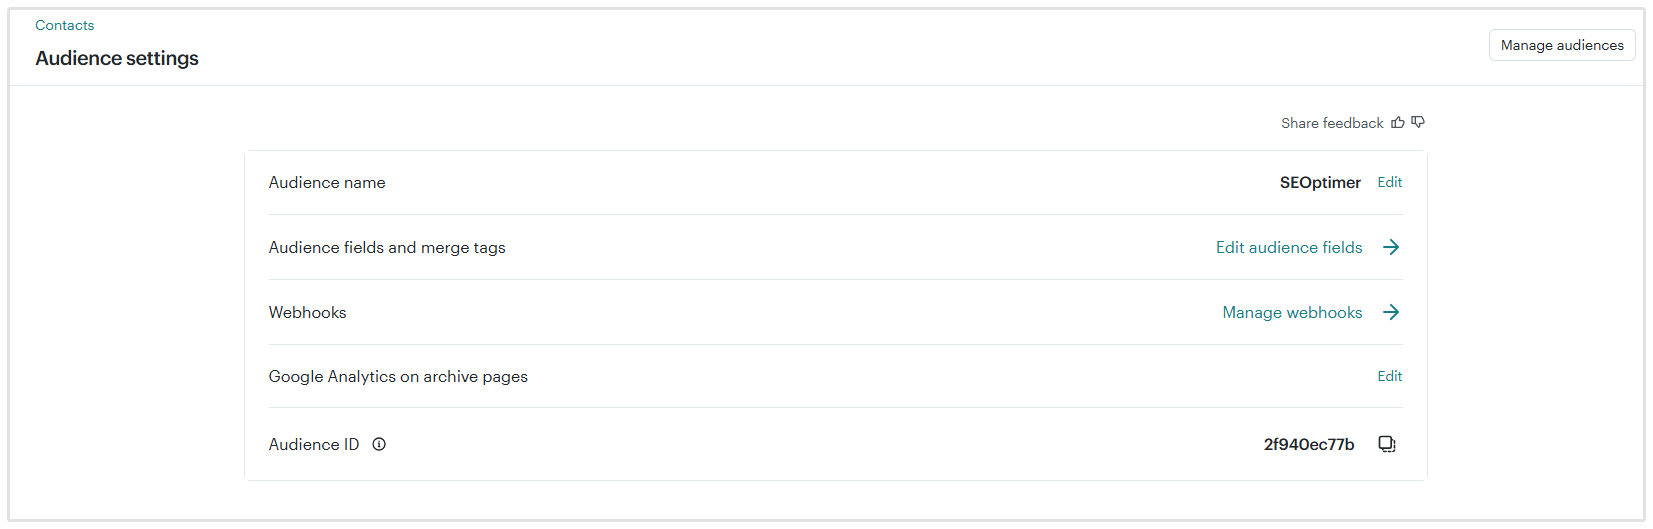
Once the page has loaded, click on the button with the three dots to expand the audience options and click on Audience Settings:
.png)
Notice our Audience name is called "SEOptimer" - we'll refer to this later while setting up Zapier. Next, click Edit Audience Fields next to the Audience fields and merge tags option:
We want to create a new field to capture the audit URL that the lead entered when submitting the Lead form on your website. This is really useful as a merge field in future email campaigns. To do this, scroll to the bottom and click the "Add A Field" button:
.png)
A new row of options will appear above the button. Choose "Website":
.png)
Finally, give the field a descriptive name like "Audit URL", then click the "Save" button.
The other thing we want to do in Mailchimp is create a Tag which we will apply to all subscribers that are added via the Embeddable Audit Tool.
This will be really useful for segmentation in the future. To do this, select "Tags" in the Audience menu, then click the "Create Tag" button:
.png)
.png)
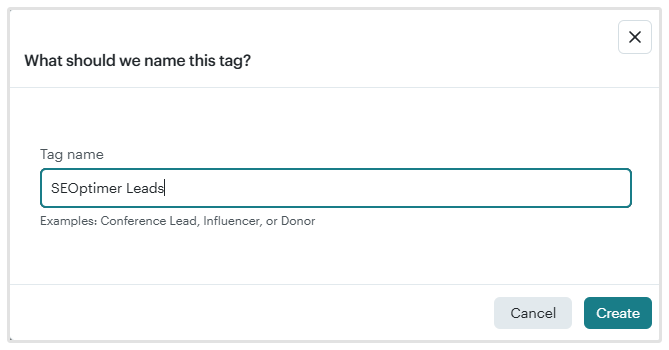
Give the new tag a descriptive name like "SEOptimer Leads" and hit the "Create" button:
2. Log In to Your Zapier Account
Go to Zapier and either log in to your account or if you're a new user, create a new account.
3. Add the SEOptimer App to Your Zapier Account
Open a new tab and visit the Embedding Settings page on SEOptimer. Scroll down to the bottom of the page:
 (1).png)
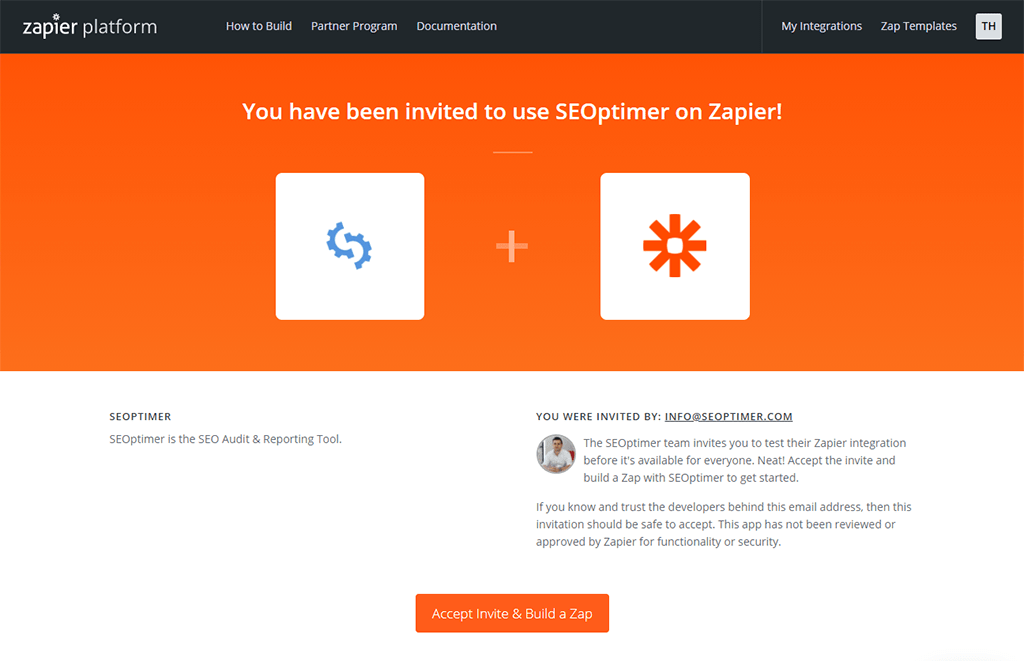
Copy the "Zapier Authorization Key" (this key is unique to your account and should not be shared with anyone), then click the blue button "Add SEOptimer to your Zapier account". This will launch the Zapier Platform page. Click the "Accept Invite & Build a Zap" button:
4. Set Up SEOptimer Trigger
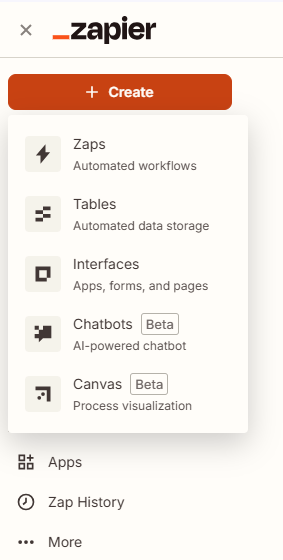
After clicking the Accept Invite button, you'll be taken back to your Zapier dashboard. Click the "Create" button in the top left and select Zaps from the dropdown menu.
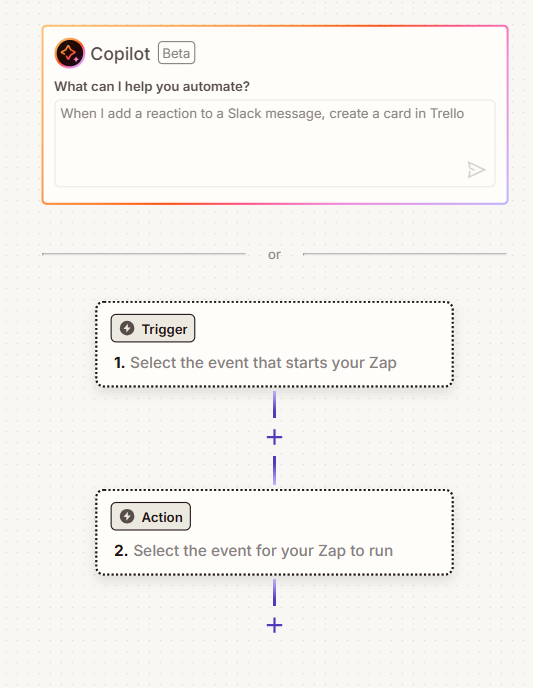
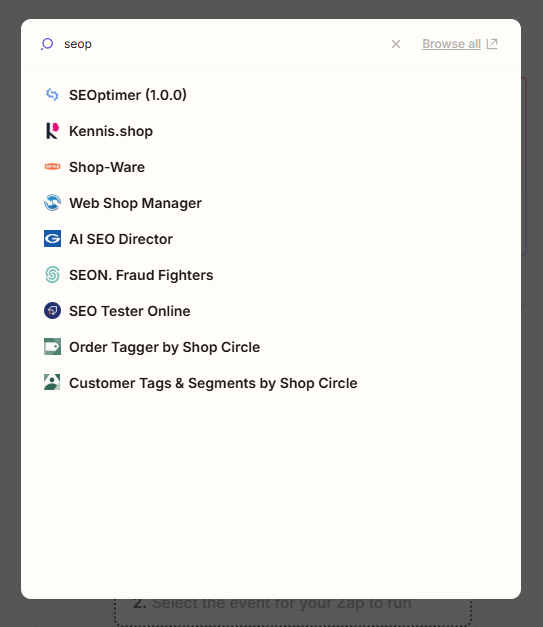
Once the page has loaded, click the Trigger field and search for SEOptimer. Then click the SEOptimer (1.0.0) app:
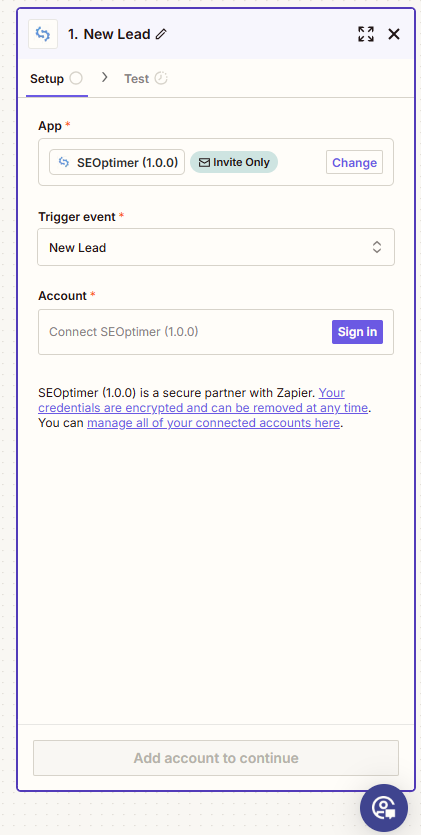
Under Trigger Event you'll need to select "New Lead":
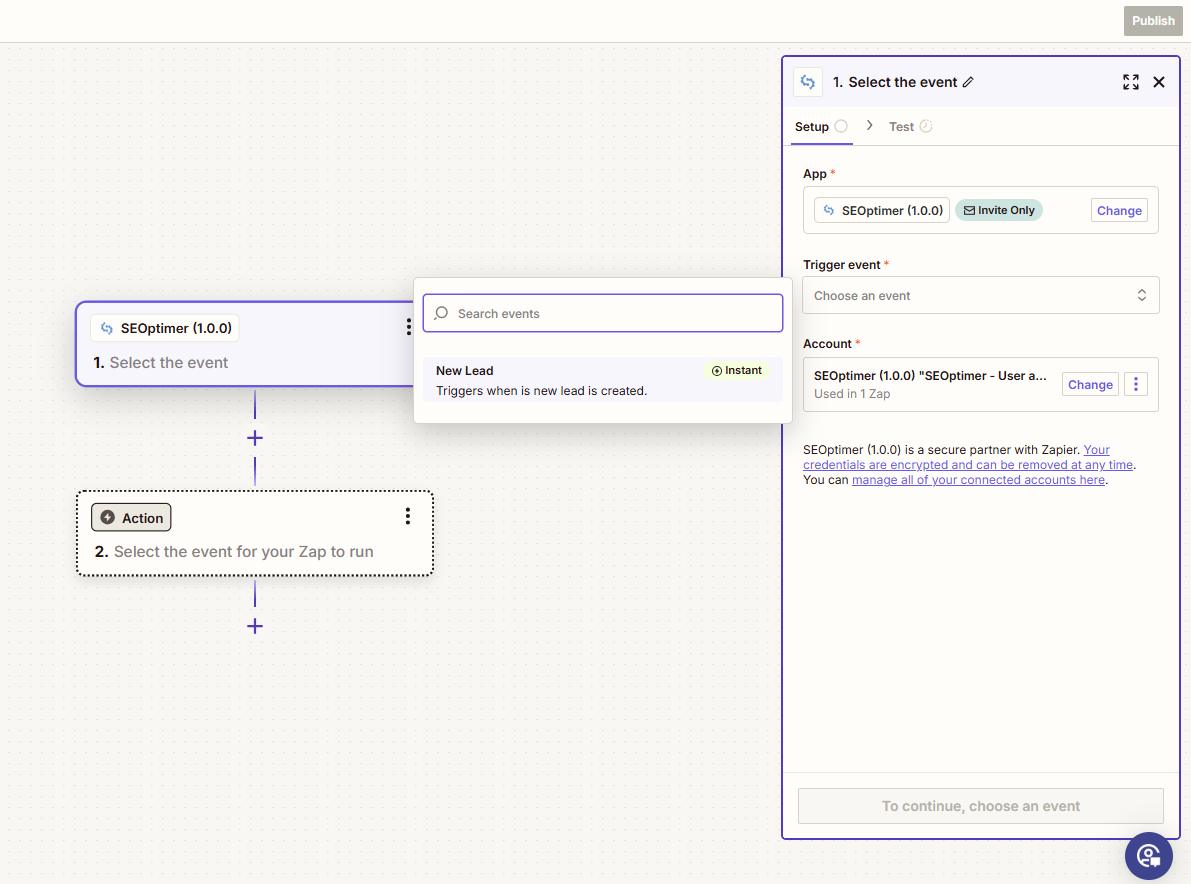
Next you'll need to click the blue 'Sign In' button in the Account field to add your SEOptimer account:
This will launch a popup window where you'll need to paste your API key (this key is unique to your SEOptimer account, remember never to share it with anyone else):
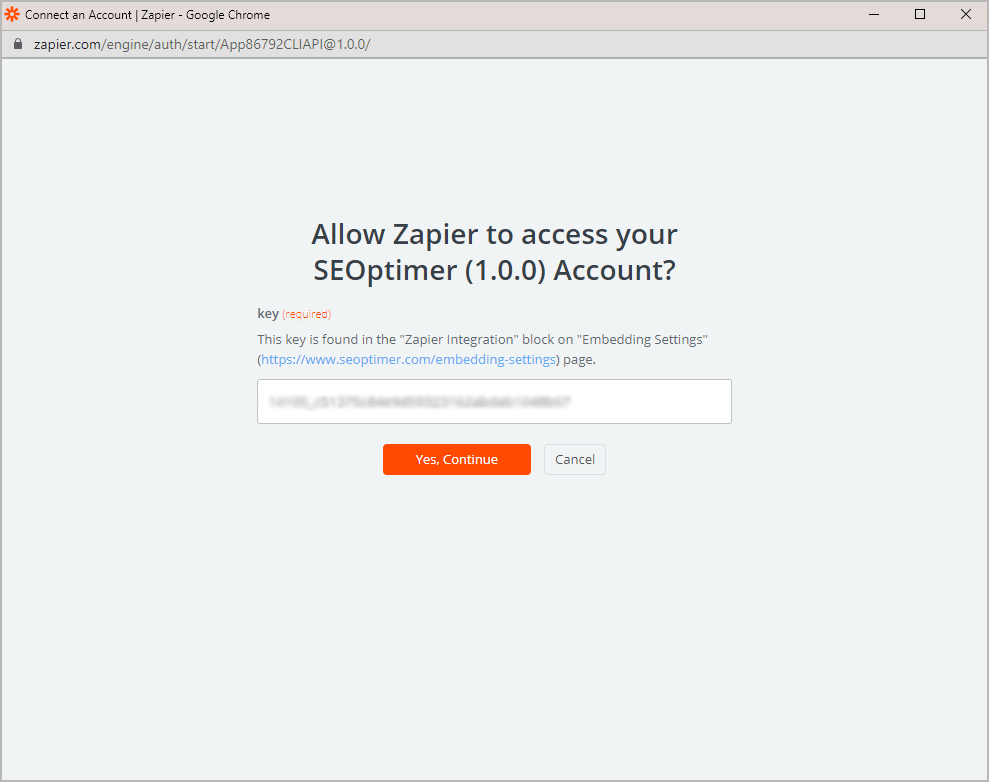
Click "Yes, Continue" and you'll return to the Zap setup with your account details pre-populated. Click "Continue":
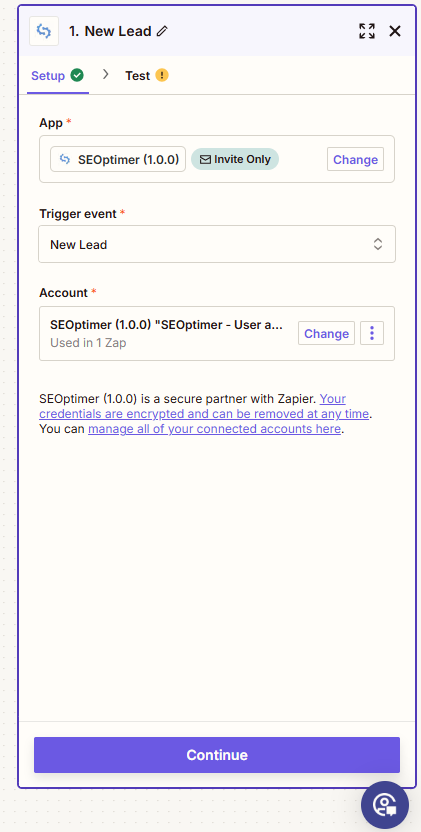
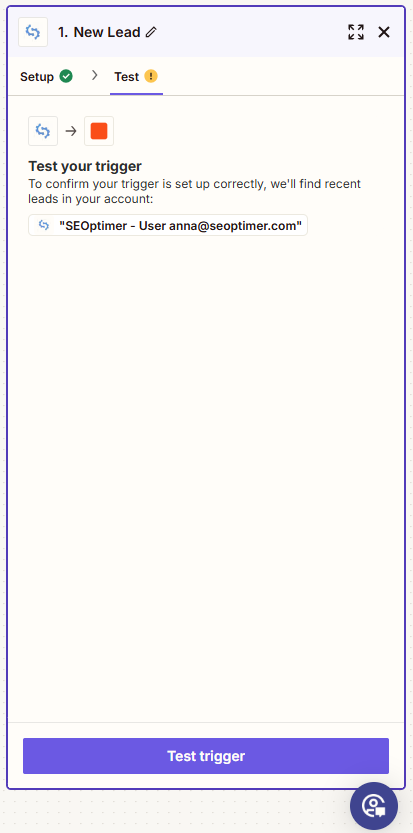
The SEOptimer setup is now complete. Click "Test trigger":
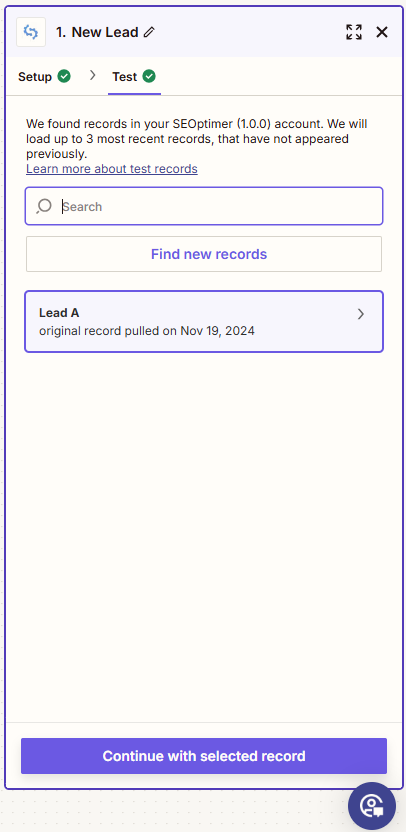
You'll see test records called "Lead A" which we populate automatically so you can test the setup all the way through to Mailchimp. Click "Continue with selected record" at the bottom of this confirmation page:
5. Create Mailchimp Action
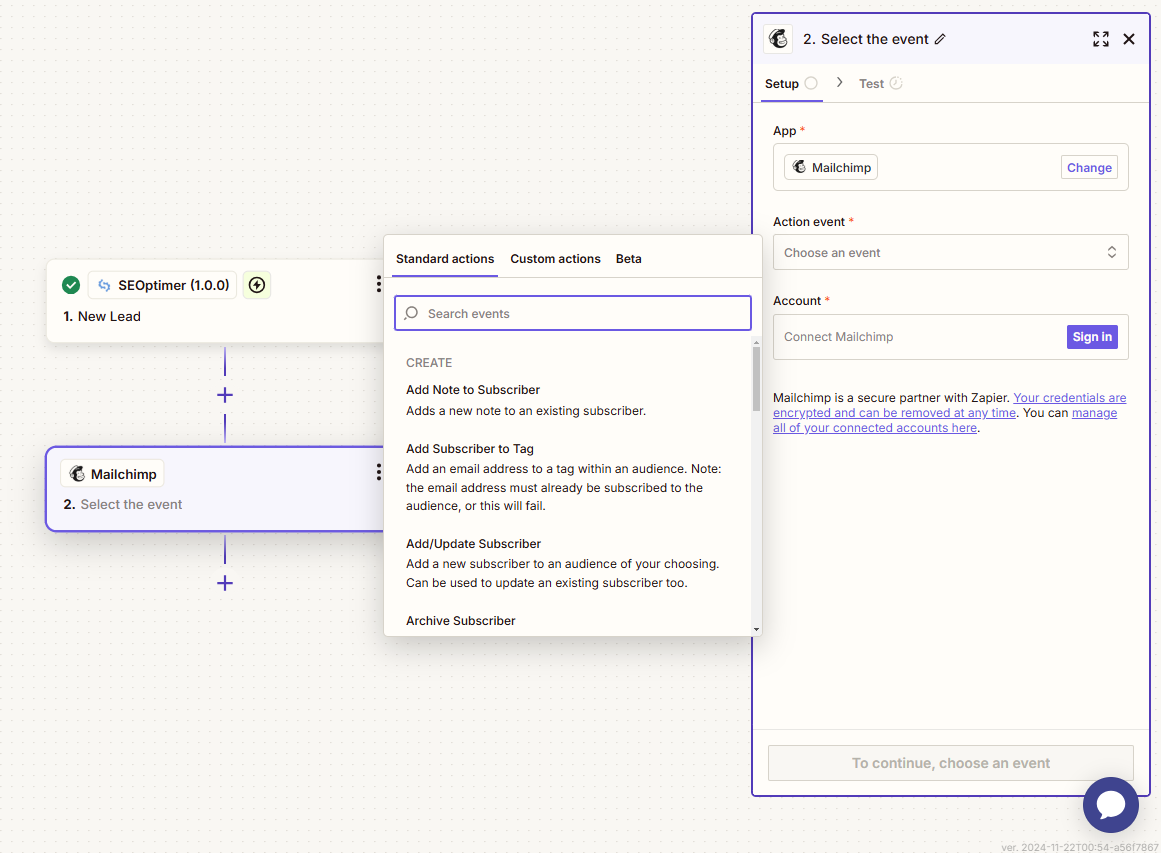
Once you've selected your test records you'll be prompted to select the App you'd like to integrate with. In this case we're connecting with Mailchimp so select Mailchimp from the menu.

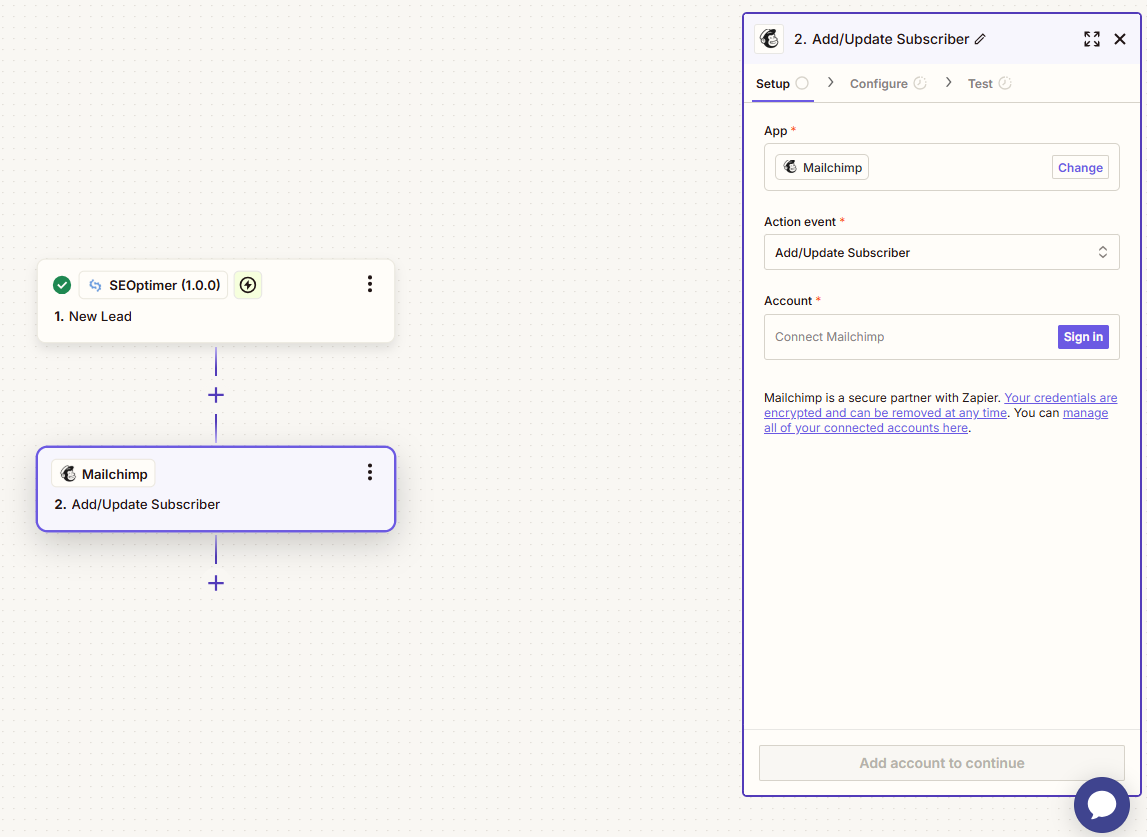
Next click on the Action Event field choose the "Add/Update Subscriber" event:
Under the Account field click the blue "Sign in" button to connect your Mailchimp account:
This will open a new window for you to log into your Mailchimp account:
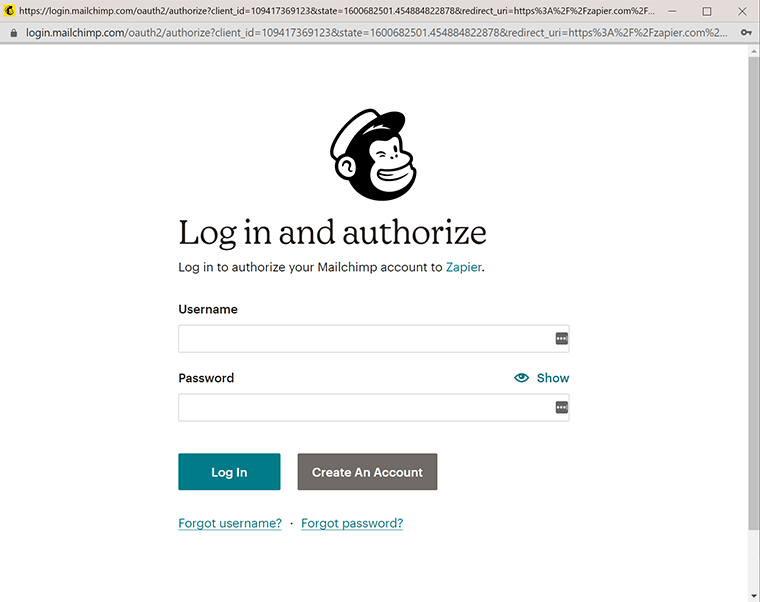
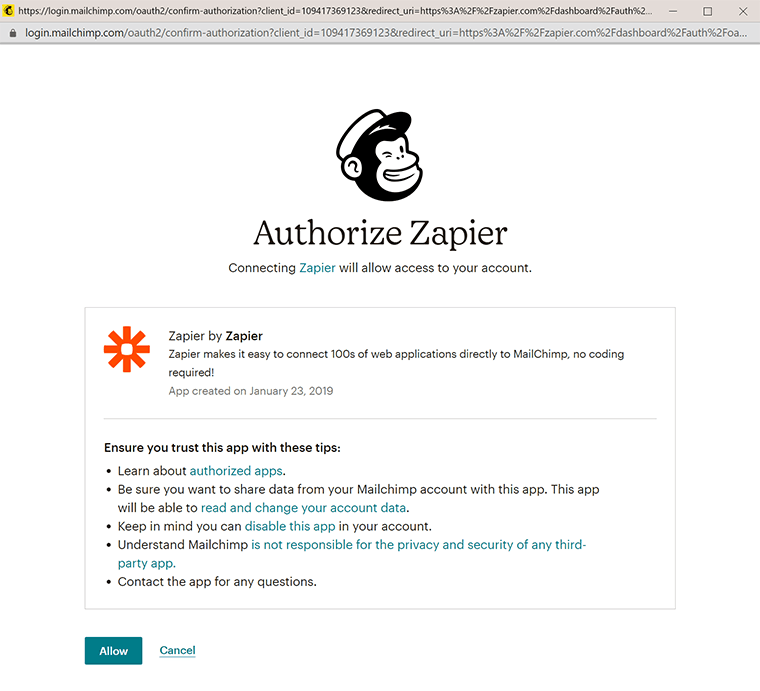
Click the "Allow" button to grant Zapier access to your Mailchimp account:
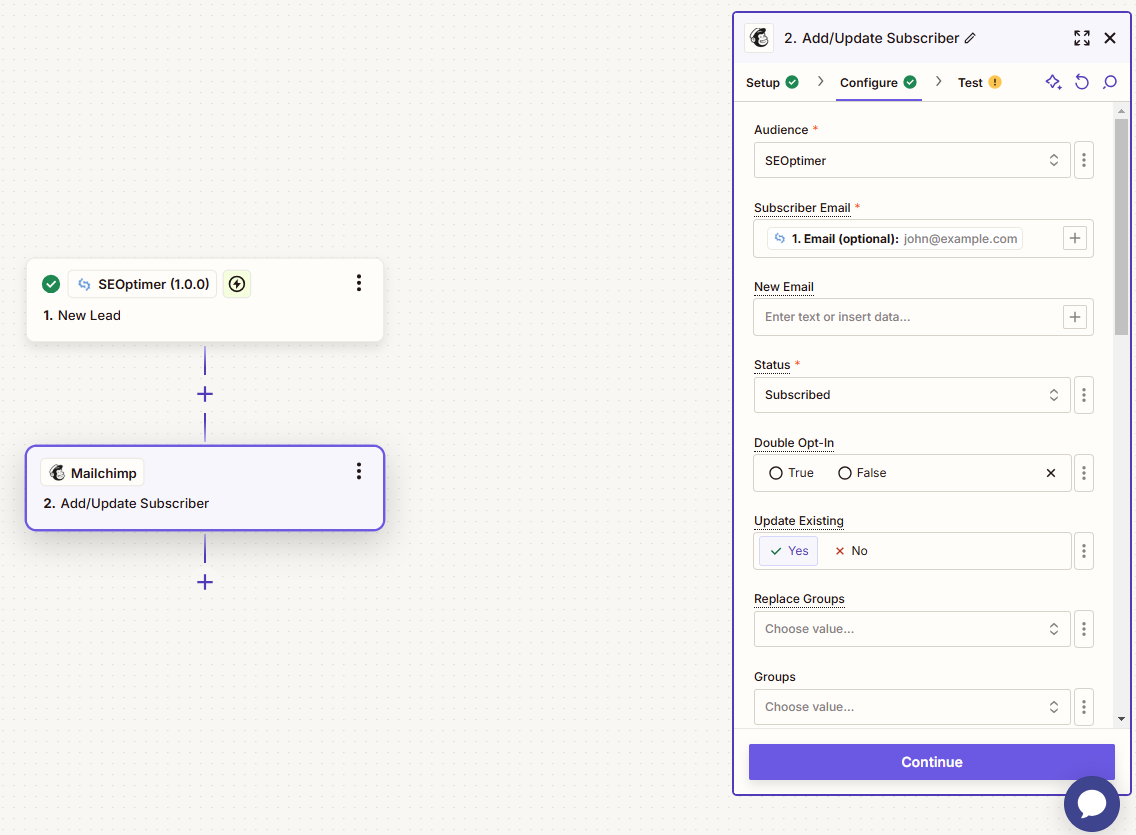
The next step is to populate the Mailchimp fields with the data from the SEOptimer trigger. Although there are several other fields during this setup, below are the six main fields required to push the Lead data into Mailchimp:
- Audience - we've selected our Mailchimp Audience called "Newsletter Subscribers"
- Subscriber Email - choose the "Email" field from SEOptimer
- Tag(s) - we're assigning the "SEOptimer Leads" tag we set up in Step 1 to identify these subscribers as coming from the Embeddable Audit Tool (this will be handy for segmenting them in future email campaigns)
- First Name - choose the "First Name" field from SEOptimer
- Last Name - choose the "Last Name" field from SEOptimer
- Audit URL - choose the "Website URL" field from SEOptimer
Then click "Continue":
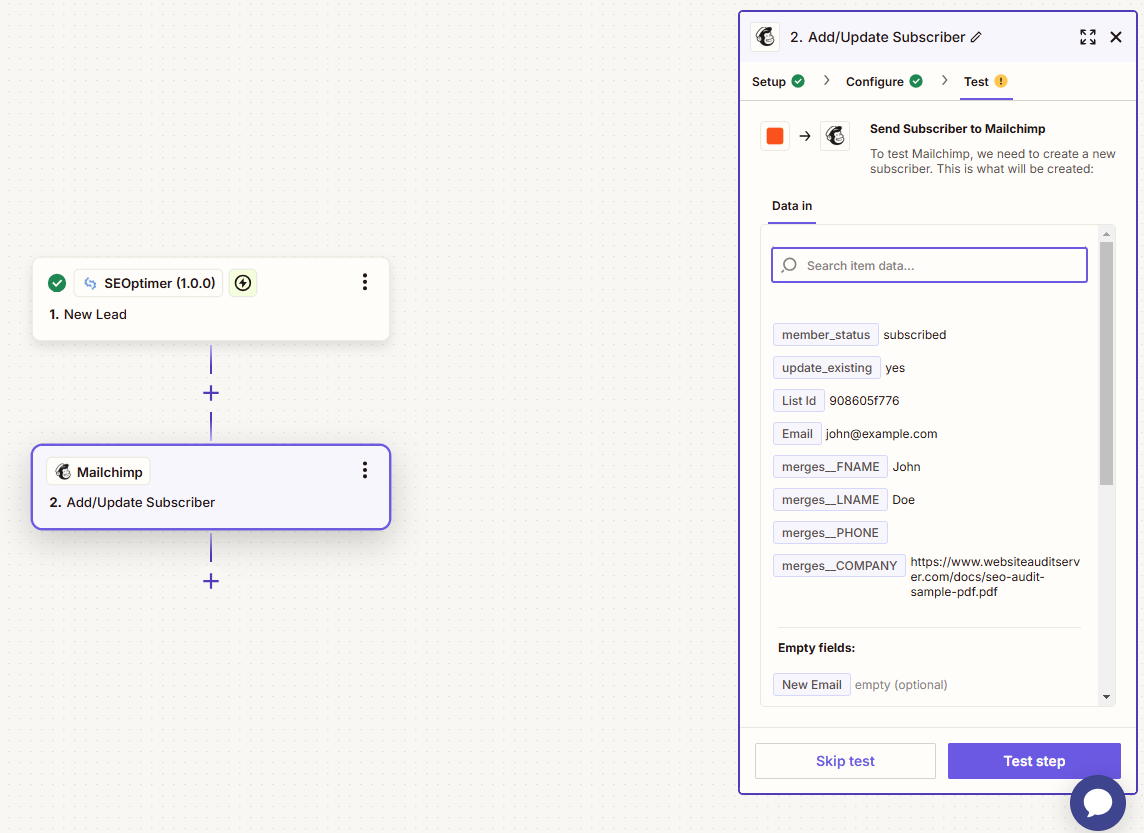
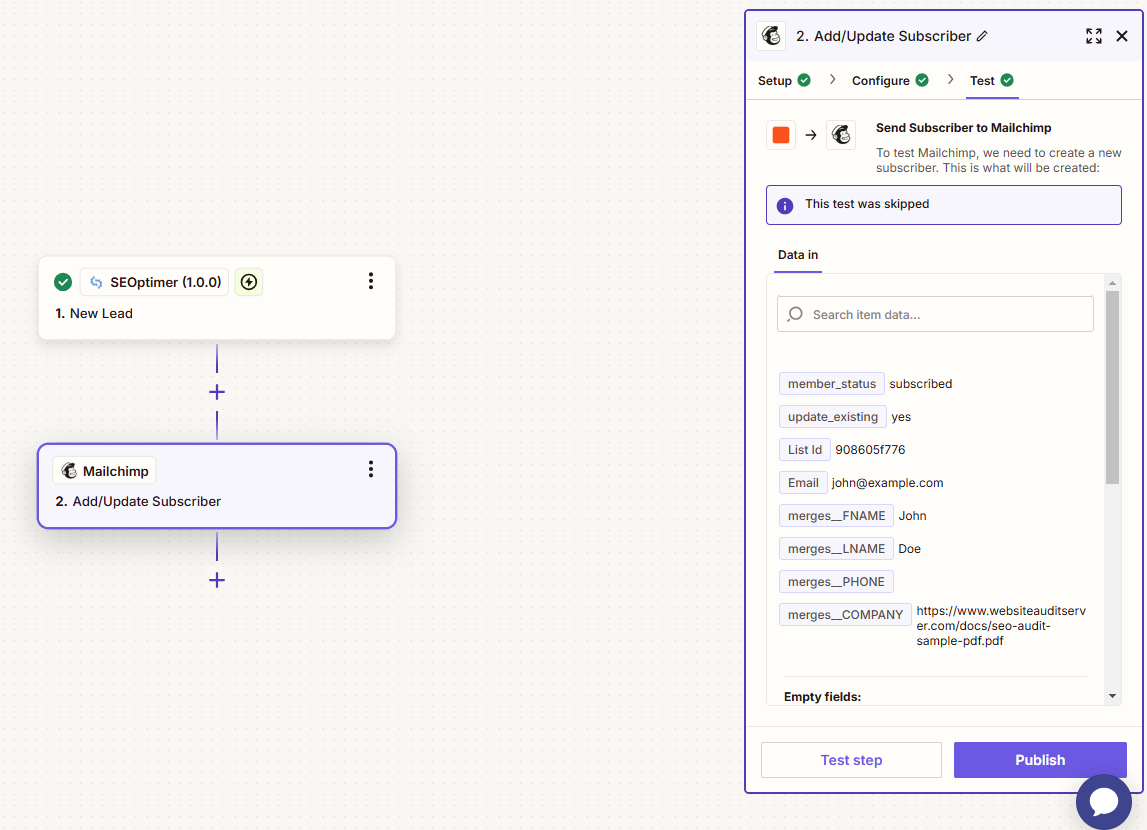
Click "Test Step" to push the test data into your Mailchimp Audience:
Then you're done! Remember to hit "Publish" to activate the automation:
6. Check the Test Lead Data in Mailchimp
Open Mailchimp and check to make sure the test Lead appears in your Audience correctly.
If you have any questions or issues during set up, feel free to get in touch via our live chat in the bottom, right-hand corner.