What is SSL?
SSL (Secure Socket Layer) is a security technology that establishes an encrypted link between servers and clients. Servers, in this case, are usually web servers (which are “house” websites) and clients are browsers like Chrome, Safari, Mozilla and Microsoft Edge. Another example would be mail servers and mail clients (in this case, servers are “house” emails and clients are the email service providers, for instance, Gmail, Yahoo Mail, and Outlook).
SSL technology is standard and allows for the secure transfer of sensitive information, such as social security numbers, login credentials, and credit card or multi-currency card information. Usually, when data is sent between browsers or web servers it is in plain text,making it very easy for someone else to intercept.
SSL can also be described as a security protocol. Since a protocol describes how an algorithm should be used, SSL determines what the variables for the link and data being transmitted can or cannot be.
How does SSL work?
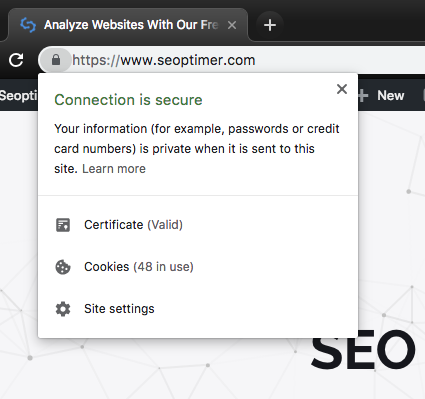
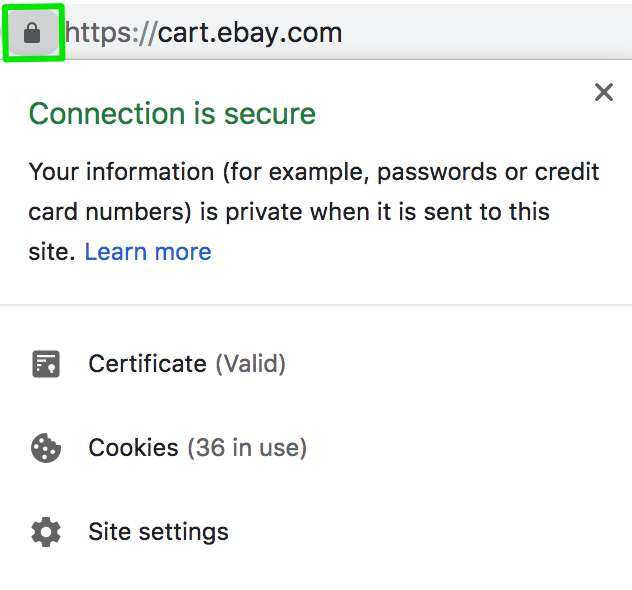
All browsers can interact with secured web servers via the SSL protocol. An SSL certificate is needed, however, to ensure that a secure connection is established. When a website has a valid SSL certificate, it is said to be “SSL enabled”. It will have a lock icon just before the URL, a green address bar and/or will begin with HTTPS rather than HTTP.
It is important to note that after SSL version 3, the existing protocol was replaced by the TLS (Transport Layer Security) protocol. So as much as we will discuss SSL and continuously refer to it throughout this article, we will also discuss TLS.
Both SSL and TLS combine authentication and encryption. The communication process usually begins with a client contacting a server via sending a request. The server then responds. With SSL, the only party that needs proof of authentication is the client. With TLS, both the client and server need proof of authentication.
Proof of authentication involves the use of an encryption key, which is the element that actually protects transmissions once a connection has been established.
With SSL, the user must hold a valid certificate in order to validate either the client or the server. The certificate contains an address, digital signature and a validity period. The certificate is issued by Certificate Authorities (CA) like Lets Encrypt. We will look at CAs a bit later.
When a client contacts the server, it (the server) presents a certificate. The server then sends certificate details to the clients and confirms the details of the client’s certificate with the issuing Certificate Authority. Any discrepancies between the client certificate details and the details that the Certificate Authority provides result in no connection.
The client’s certificate needs to be current too, and the client also must check the details of the server’s certificate before a secure connection is established.
Essentially, when we talk about the concept of “SSL enabled,” all we are talking about is whether or not the address being used by either the client or server has a valid certificate. User authentication is another level of security that utilizes methods like usernames and passwords.
The certification process for domestic users is usually handled by the user’s browser. For servers, a certificate database is needed in order to get certification. The certificate then needs to be downloaded into the database and activated.
Where is the SSL certificate located?
The SSL certificate checking process is embedded in the client’s browser or in the server’s software.
Certification Authorities
We mentioned earlier that certificates are used to authenticate clients and servers and are issued by Certification Authorities (CAs). CAs accept certificate applications, authenticate the applications, issue certificates, and keep record of any information regarding issued certificates.
Certificates ensure that people do not masquerade as people who they are not. CAs verify the applicant’s identity via digitally signing the applicant’s certificate. The digital signature is then used to ascertain the user’s or server’s authenticity.
Who are some Certification Authorities you can look out for?
Let’s Encrypt - This is an open source CA. Getting a Domain Validation certificate is absolutely free, as is renewal. You can also apply for several certificates. It is a good option for people on a budget.
Symantec - This CA has a lot of features but is a bit expensive. You can apply for at least five different certificates.
Geotrust - This CA has mid-range pricing and includes features such as free certificate re-issue and unlimited server licenses.
Comodo - This CA offers a free trial for premium SSL certificates (Domain Validation). SSL certificates include a warranty.
Digicert - This one, like Geotrust, has mid-range pricing and includes a warranty worth $1 million in addition to free re-issues and a logo that you can use on your site. Five different certificates are available.
Why do you need an SSL certificate on your website?
By now you understand the concept of SSL, but you may still be wondering why you need to go through the trouble of getting an SSL certificate.
Google moved toward a more secure web by strongly advocating that sites adopt HTTPS encryption. In July 2018, Google, with the release of Chrome 68, will mark all HTTP sites as “not secure”:
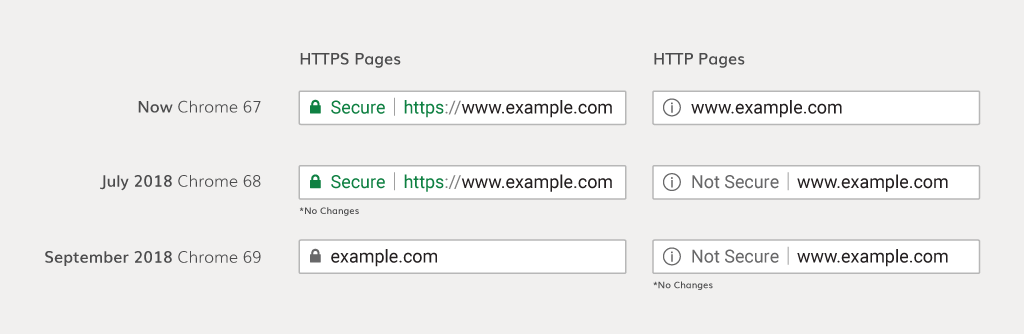
Example from Digicert.
Secure online payments
If your website accepts credit payments and/or stores customer’s financial information, you should use SSL to keep your users safe from intercepted information. Moreover, the hosting providers and credit card companies are highly likely to make SSL a requirement.
User confidence
We mentioned that a site that uses SSL will have a lock icon just before the URL, a green bar or use HTTPS instead of HTTP. These signals illustrate that your site is secure and increase users’ confidence in your site.
Faster loading times
Sites using HTTPS load 83% faster than those using HTTP. You can do your own test here.
You will, however, need to use a private window in order to prevent image caching.
Ensuring the login process is secure
An SSL will allow you to protect your users’ personal information, as well as any data they may enter while using your site.
Better search engine rankings
Sites that use SSL certificates are likely to rank higher, as Google confirmed in 2014 that HTTPS was one of the ranking signals. Other search engines also included website security in their ranking algorithm.
How to enable SSL for WordPress
We’ve written a dedicated guide to help you install SSL for your WordPress site.
You can get a free SSL certificate if WordPress is your CMS and if you use a hosting company that offers free SSL certificates. Here are some popular domain hosting providers offering free SSL certificates:
Siteground
Dreamhost
GreenGeeks
Bluehost
InMotion Hosting
WPEngine
Liquid Web
Note: Most free SSL certificates are issued by Let’s Encrypt.
If you have not installed WordPress to your newly purchased domain:
If your web hosting provider uses cPanel, you’ll need to go to your cPanel and locate Top Application and click on WordPress:
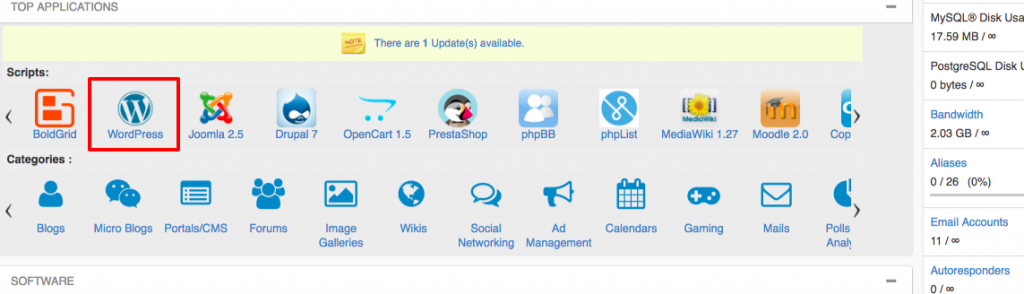
To install WordPress on your new domain, click on Install:
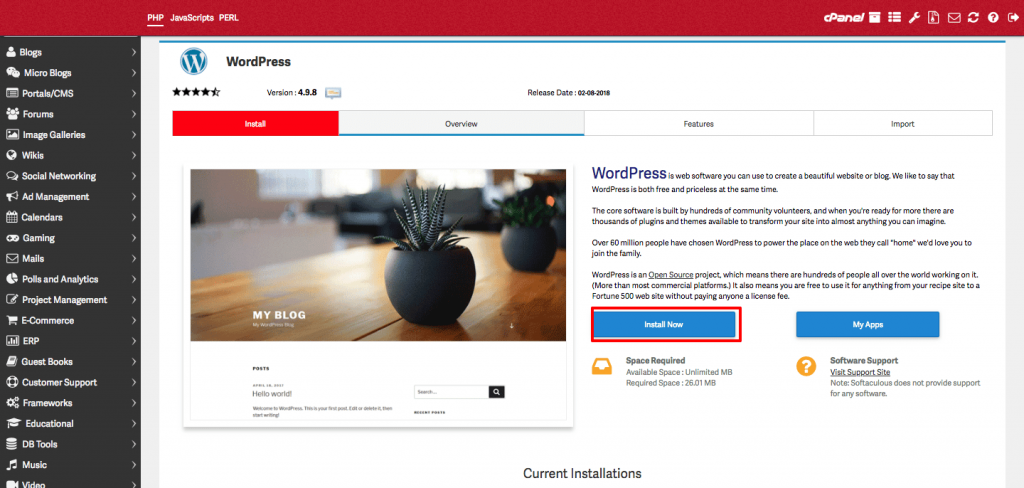
Set the Protocol to either https:// or https://www

Activating SSL if you already have WordPress
If you’ve already installed WordPress and been hosted by any of the aforementioned companies, you can activate your SSL certificate from your hosting dashboard.
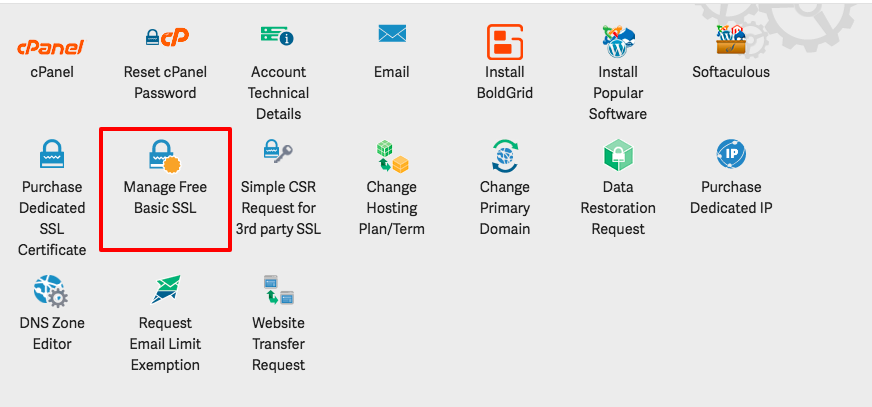
Let’s look at how to activate SSL on a WordPress site hosted by Inmotion Hosting as an example.
Access your hosting dashboard through My Account on CPanel and click on Manage Free Basic SSL:
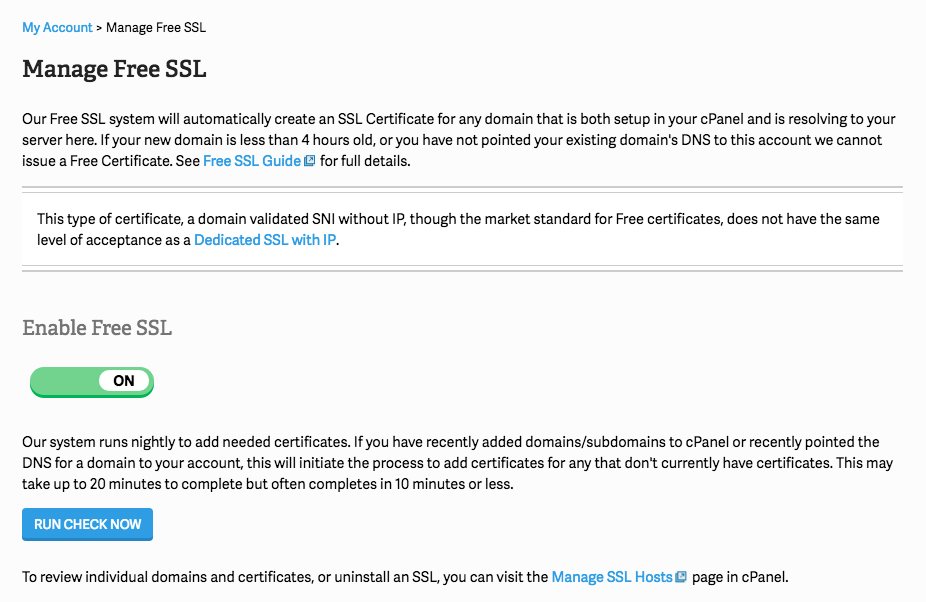
Turn on Enable Free SSL:
If you’ve already installed WordPress and need to activate SSL:
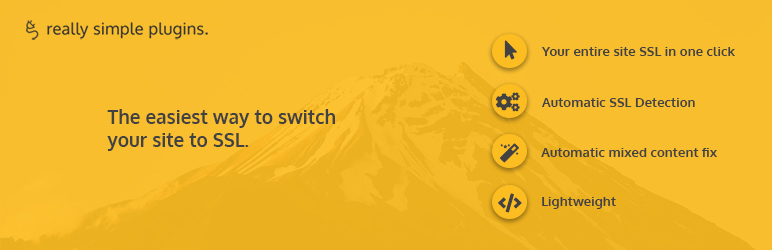
You need to set up WordPress so that your URLs read HTTPS instead of HTTP. To do this, install and activate the Really Simple SSL plugin.
Once you have activated it, you will get notifications to check for:
- HTTP references in your .css and .js files. You should change any HTTP:// into //.
- Images, stylesheets or scripts from a domain without an SSL certificate. You should remove these or move them to your own server. You can also go to Really Simple SSL settings located in Plugins:

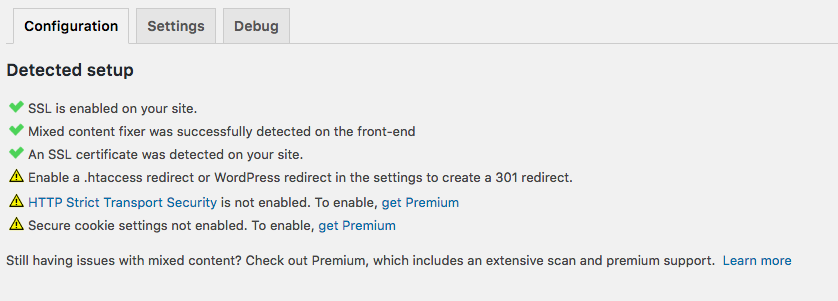
Your Configuration setup should be detected:
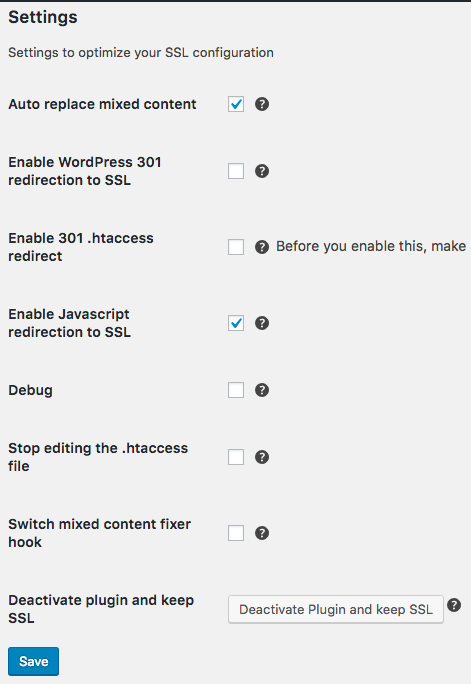
Under Really Simple SSL Settings, the following should be checked:
You may need to back up your site before you activate SSL. To do this, you can install and activate a plugin called UpDraftPlus. It has a very friendly UX that will guide you while backing up your site.

Once you have backed up your site, return to Really Simple SSL and click “go ahead and activate SSL”.
You should see a notification that reads “SSL activated”. Your WordPress site should now begin with HTTPS.
How to enable SSL for Wix
With Wix, you get a free SSL certificate.
To enable HTTPS/SSL:
Access your dashboard and scroll toward the bottom of the page until you see HTTPS. Then click "Manage":
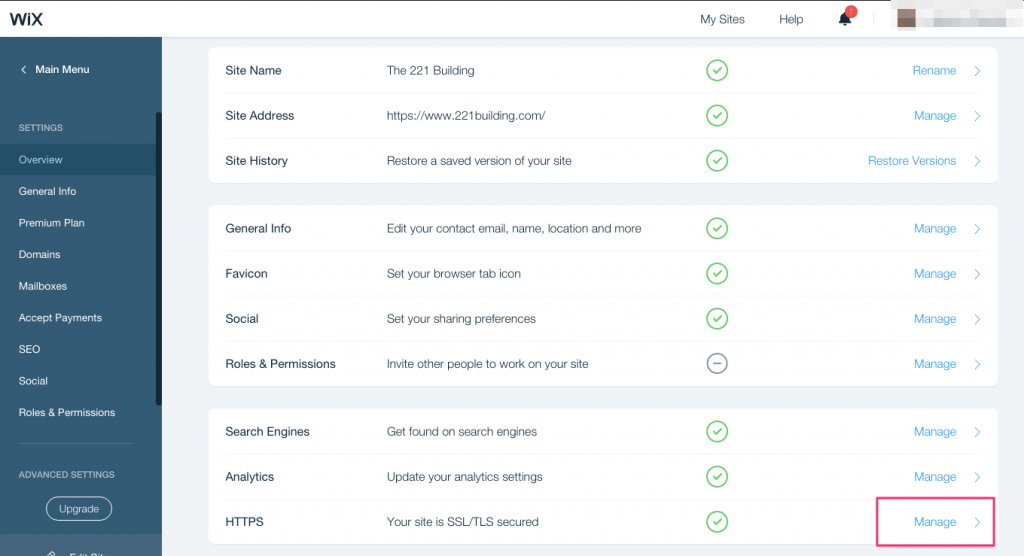
Click “Turn on HTTPS” (the screenshot shows “Turn off” since it has already been enabled) followed by “continue”:
How to enable SSL for Shopify
Shopify provides free 256-bit SSL certificates for web pages, data, and content on all eligible Shopify sites. In fact, SSL is available site-wide.
Shopify’s SSL certificates are usually activated by default for the store’s checkout and for content hosted on .myshopify.com domains.
As you enable SSL, you may notice that you need to enter an HTTPS address (if using WordPress as a CMS). You might wonder how to make your URL begin with HTTPS, if it still starts with HTTP.
Moreover, when you add an SSL certificate, you must ensure that all your HTTP URLs redirect to their HTTPS versions.
Let’s take a moment to look at a concept we will call HTTPS redirect.
Why is Redirect to HTTPS So Important to your Website?
A few years ago, whether your website was using the HTTPS or HTTP connection, it really didn’t matter a lot. In fact, the main aim was to facilitate traffic and that is all. But since we are in a modern world, things have changed a bit. Google, in July 2018, included HTTPS as one of the ranking determinants.
This is a really bad news to your website in case you’ve not changed from the usual HTTP to the encrypted HTTPS. Redirect to HTTPS has quite a number of significance to your website, and ultimately, your business at large. Below are some of the benefits, let’s have a look!
1. HTTP or HTTPS duplicate issue
Minus redirect to HTTPS, the search engines perceive your website as multiple websites with duplicate content. Your https://www.example.com can be treated by Google as a different URL than http://www.example.com.
Here's what Google has to say, “The preferred domain is the one that you would liked used to index your site’s pages (sometimes this is referred to as the canonical domain). Links may point to your site using both the www and non-www versions of the URL (for instance, http://www.example.com and http://example.com). The preferred domain is the version that you want used for your site in the search results.”
2. High Security of the Data Being Transferred
The TLS/SSL certificate provides maximum encryption to your data. This prevents hackers from accessing your company’s delicate information. Needless to say, it’s actually to redirect to HTTPS that has made online transactions possible.
3. Boosts your Website’s Integrity
Everyone just wants to be associated with safe things. Unlike in the past, most browsers are currently warning users whenever they try visiting a website which is not encrypted. This would scare them away and it won’t take long before you can begin counting losses.
How to redirect to HTTPS
For your URLs to redirect to their HTTPS versions, you must edit the .htaccess (Hypertext Access) file. Let’s look at this a bit more
The .htaccess file
The .htaccess file can be defined as a configuration file which controls the directory and subdirectories where it is located on the server.
The .htaccess file contains directives on how the server should act in certain circumstances; for instance, what to do when URLs need to be rewritten, when a password is required to access the directory where the .htaccess file resides, or when the .htaccess file redirects users to a different index file. Each of these examples affect your website’s function.
You can edit the .htaccess file on your computer and use an FTP client to upload it to a computer or access the file via your service provider’s cPanel.
Note that you can redirect all web traffic to a specific domain or folder.
.htaccess rules
You must adhere to some rules when editing the .htaccess file. Here are a few of those rules:
- The file must only be named “.htaccess” - note the period just before “h”. There is no .txt or .htm file extension.
At this point, we will focus on the particular rule when performing different types of redirects:
1. Redirecting a single page:
Redirect 301 /pagename.php http://www.domain.com/pagename.html:
2. Redirecting an entire site to a subfolder
Redirect 301 http://www.domain.com/subfolder/
3. Redirecting a file extension while retaining the page name
An example here would be wanting to use an .html extension to use the same file name but use the .php extension:
RedirectMatch 301 (.*).html$ http://www.domain.com$1.php
4. Redirecting an entire site or domain to a new one
Redirect 301 /http://www.domain.com/
5. Redirecting a subfolder to a different website
Redirect 301 /subfolder http://www.domain.com/
6. Using rewriting to redirect from an old domain to a new domain
RewriteEngine on
RewriteBase /
RewriteRule (.*) http://www.newdomain.com/$1 [R=301,L]
7. Using rewriting to redirect a domain to a www. location within a subdirectory
RewriteEngine on
RewriteBase /
Rewritecond % {HTTP_HOST} ^domain.com [NC]
RewriteRule ^(.*)$ http://www.domain.com/directory/index.html [R=301,NC]
8. Using rewriting to redirect from a non-www. to a www. subdomain
RewriteEngine on
RewriteBase /
rewritecond % {http_host} ^domain.com [nc]
RewriteRule ^(.*)$ http://www.domain.com/$1 [r=301,nc]
9. Using rewriting to redirect from an old domain with a subdirectory to a new domain without a subdirectory, but one that includes the full path and query string
Options +FollowSymLinks
RewriteEngine on
Rewritecond % {REQUEST_URI} ^/subdirname/(.*)$
RewriteRule ^(.*) http://www.katcode.com %1 [R=302,NC]
10. Using rewriting to redirect from an old domain to a new domain that includes the full path and query string
Options +FollowSymLinks
RewriteEngine on
RewriteRule ^(.*) http://www.newdomain.com %{REQUEST_URI} [R=302,NC]
11. Redirecting URLs with query parameters and placing files in a subdirectory
An example here would be:
Original URL: http://www.website.com/sub-dir/index.php?id=3
New URL: http://www.website.com/path-to-new-location/
RewriteEngine on
Rewritecond % {QUERY_STRING} id=3
RewriteRule ^sub-dir/index.php$ /path-to-new-location/? [L,R=301]
12. Rewriting and redirecting URLs with query parameters with files placed in a root directory
An example here would be:
Original URL: http://www.website.com/index.php?id=3
New URL: http://www.website.com/path-to-new-location/
RewriteEngine on
Rewritecond % {QUERY_STRING} id=3
RewriteRule ^index.php$ /path-to-new-location/? [L,R=301]
These are just some of the common rules.
Mixed content
As you may have seen with the .htaccess rules, if not well implemented, you may end up with what we call mixed content.
In order to understand the concept of mixed content, you need to understand how search results are delivered. When a browser visits a web page, it requests an HTML resource. The web server returns the HTML content which is parsed and presented as search results. Since one HTML file is not enough to display an entire complete page, the HTML file must include references to other resources (for instance, images or videos, or even Javascript files). Extra resources are fetched using separate requests.
When HTML is loaded over a secure HTTPS connection, but additional resources (like those just mentioned) are loaded over an insecure HTTP connection, we have a mixed content scenario. In these instances, browsers will display warnings to show a website visitor that the page contains insecure resources.


Resources that use insecure HTTP connections become loopholes for attacks (also referred to as “man-in-the-middle attacks”, in which the attacker can actually control the entire webpage. Even if the warning is passed to the user, it is usually too late, as the resources have already been retrieved and the security of the webpage already compromised.
Unfortunately, it is difficult for web browsers to block mixed content without affecting site functionality.
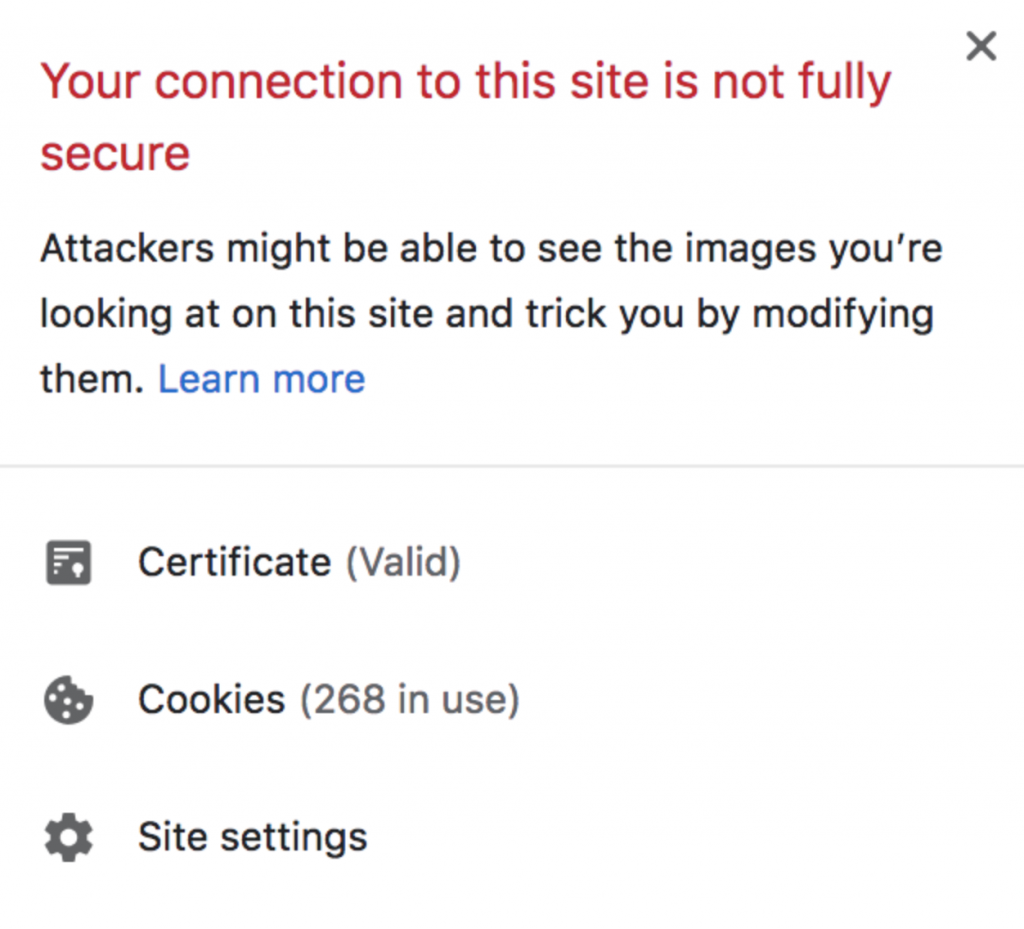
Fixing mixed content errors, therefore, becomes the smartest way to avoid attacks. Before we even fix mixed content errors, though, we must understand how they are displayed.
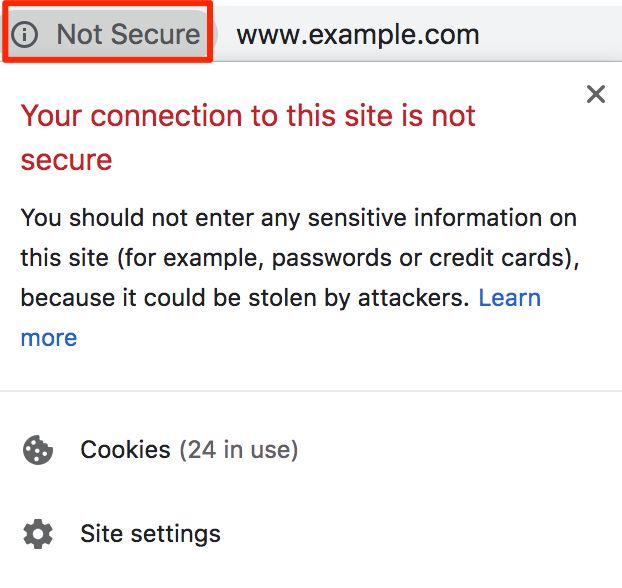
Browsers like Chrome will mark a website with mixed content as “not secure”. The users may see an image such as this one.
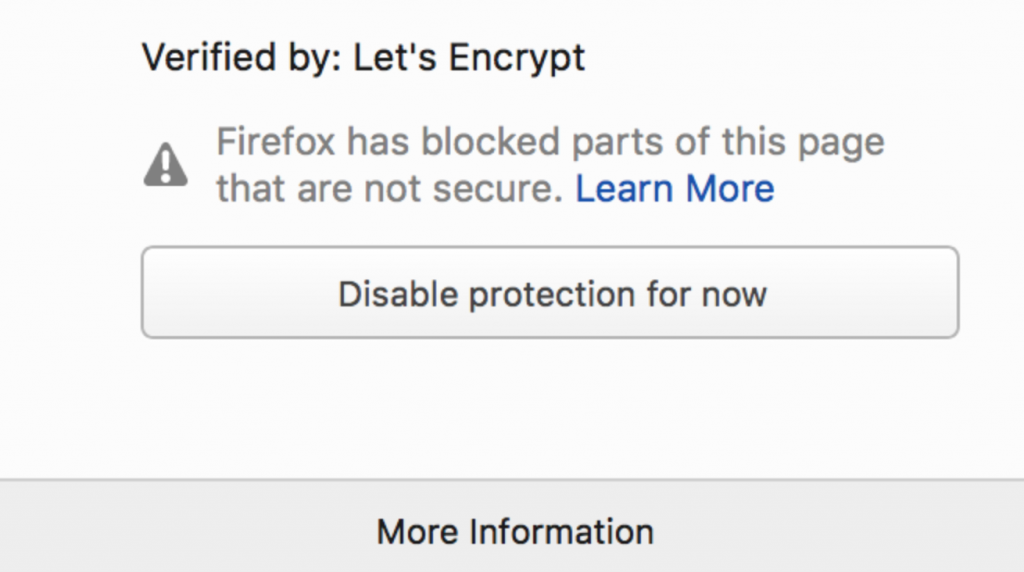
Firefox may show an image like this.
Moreover, Chrome has an extension known as HTTPS Mixed Content Locator. You can add this to your Chrome browser to check whether or not anything shows up for your website. You can also use Chrome DevTools if you want to see mixed content on a webpage.
Fixing mixed content errors in WordPress
You can use the SSL Insecure Content Fixer plugin.
1. Go to Settings then SSL Insecure Content. This will configure the plugin settings.
2. Select a content fix level.
3. Then scroll down to the HTTPS detection section. Here, you choose how to detect HTTPS content on your site.
4. Use the WordPress function as the default option.
5. If you are using other web servers like Nginx, you can select other options.
6. Click “Save Changes”.
7. You can then check to see if your site is still displaying any mixed content error messages.
8. If you still see any errors, you’ll need to readjust the fix levels in the plugin.
9. You can also work with your developer to fix mixed content errors.
How to perform a HTTPS redirect on your WordPress site
If you use a CMS like WordPress, and have no knowledge about common open source servers like Apache and Ningx, you may need to use a plugin like Easy HTTPS Redirection or Really Simple
Common issues with HTTPS redirect
While taking the step toward HTTPS is a really good move, as we have seen, wrong implementation could result in facing the wrong side of Google. Let’s look at some things to do when performing your HTTPS redirect:
- Ensure that you set the HTTPS site version as the preferred one. If you do not, you’ll have two live versions of your site which could duplicate content, causing search engine bots to do double the work and waste your search engine crawl budget.
- Ensure that all external links to your site point to the HTTPS version of your URL. If the links point to both the HTTP and HTTPS versions, social signals and link equity will get split in two.
- Add your HTTPS site version to Google’s Search Console and Bing Webmaster Tools. For the former, you must add both versions, then set your preferred domain, like we previously discussed.
- Ensure that canonical tags point to the HTTPS URL versions.
- Ensure that the 301 redirect HTTP URL versions points to the HTTPS URL versions.
- Ensure that your XML sitemap includes the HTTPS URL versions.
- Ensure that all internal links point to the HTTPS URL versions.
It is vital for SSL to be enabled in order for high website security and user confidence. It will cause your bounce rates to reduce significantly and even help you rank higher. The process to enabling SSL may be a bit technical for some to do on their own; if that’s the case, it may help to involve an experienced developer. Understanding the basic concept, however, is important.